Install And Connect A Site
Install the plugin, switch on MCP abilities, and hand Protuno a password you own. On most sites it takes about two minutes.
Connecting a site takes one plugin, one screen and about two minutes. This page walks it from the requirements to the word Live.
You will not need to open a file, edit a config or talk to your host, unless your site has something switched off that the plugin needs. When that happens, the screen tells you which thing it is.
Before you start
Check these first. Most sites already meet all of them.
| What | Needs |
|---|---|
| WordPress | 6.9 or later. |
| PHP | 7.4 or later. |
| HTTPS | WordPress only issues an application password on a secure connection. A site set to the local environment type is exempt, so a local test site works. |
| Your account | An administrator. Anyone who can manage the site’s settings can connect it. |
| Application passwords | Switched on. They are on by default, but some security plugins turn them off. |
If your site has no MCP connector yet, Protuno installs Agent Connector for WP, and that asks for more: WordPress 7.0 and PHP 8.1. On an older site, step two says exactly which one falls short and offers Read The Requirements in place of the install.
Install the plugin
The plugin comes from your Protuno dashboard, not from WordPress.org, so you upload it once by hand.
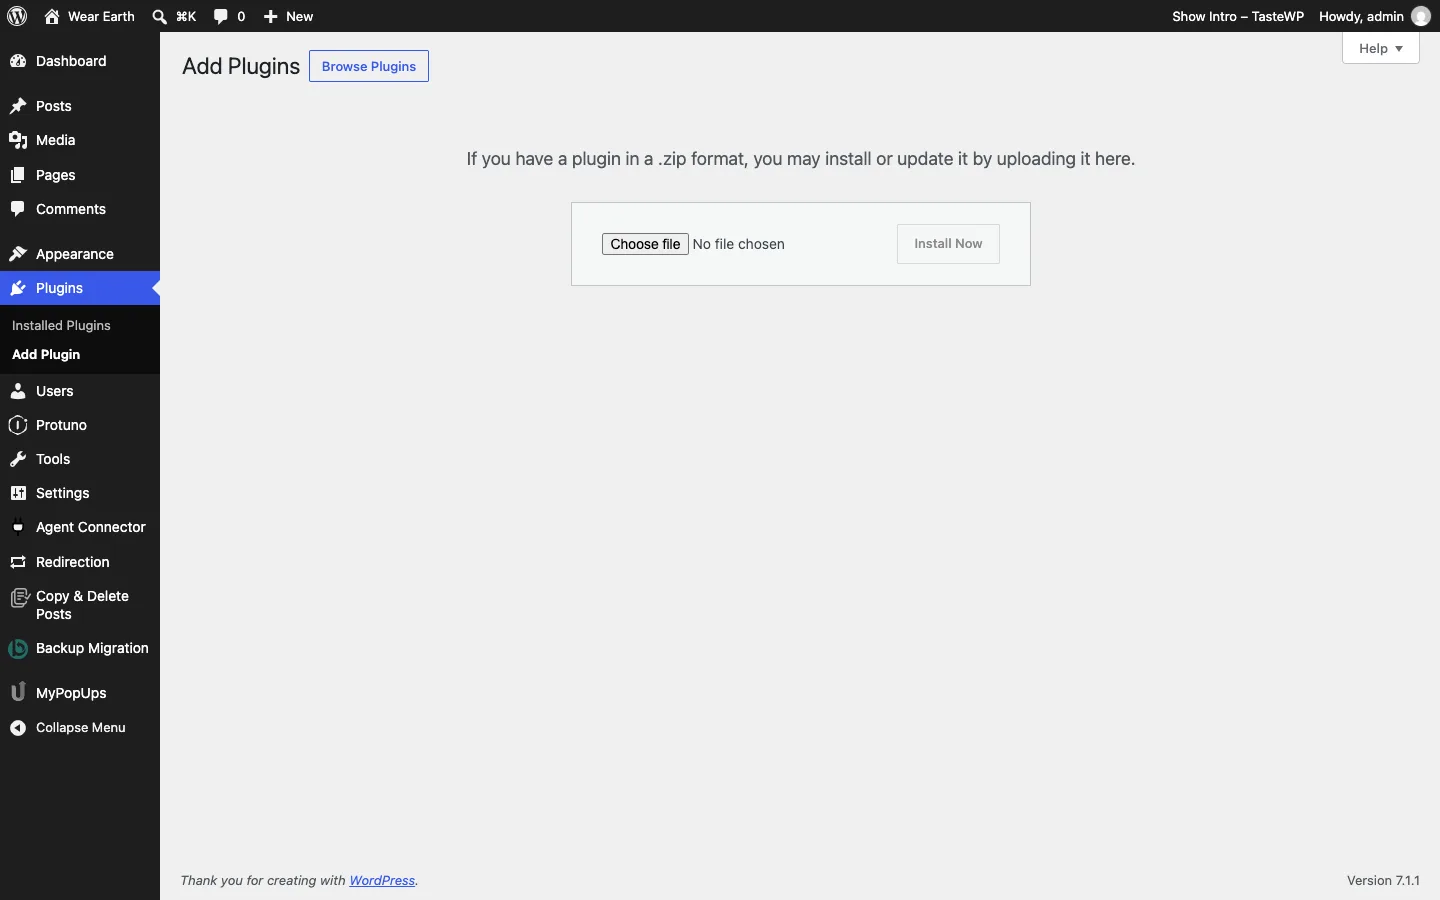
- Download the plugin zip from your Protuno dashboard.
- In wp-admin, open Plugins, Add New, Upload Plugin, choose the zip and press Install Now.
- Press Activate.
The Protuno screen opens by itself. If it does not, which happens on multisite or when you activate several plugins at once, open Protuno in the admin menu, or press Connect site under the plugin’s name on the Plugins screen.
Updates come from protuno.com and appear under Dashboard, Updates, the same as any other plugin.
Connect in three steps
The screen has a rail across the top: Welcome, Abilities, Connect. Nothing on your site changes until you press a button that says it will.
Step one: Welcome
The first screen introduces the Super Agents and what they look after. It changes nothing. Press Set Up Protuno.
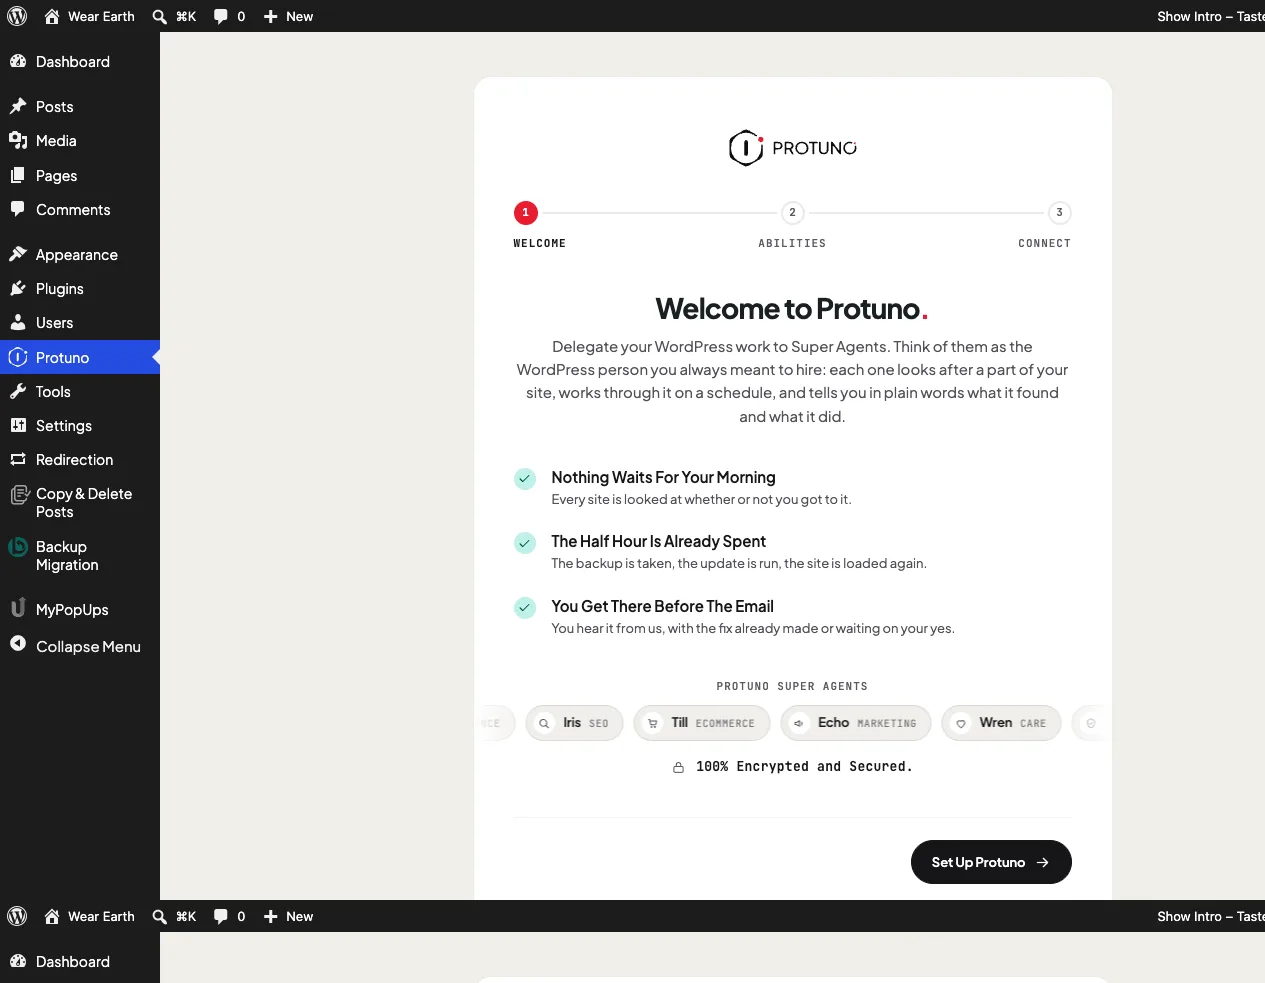
Step two: Enable MCP abilities
The second screen checks whether your site can expose abilities over MCP. It shows one of four things, and the heading tells you which.
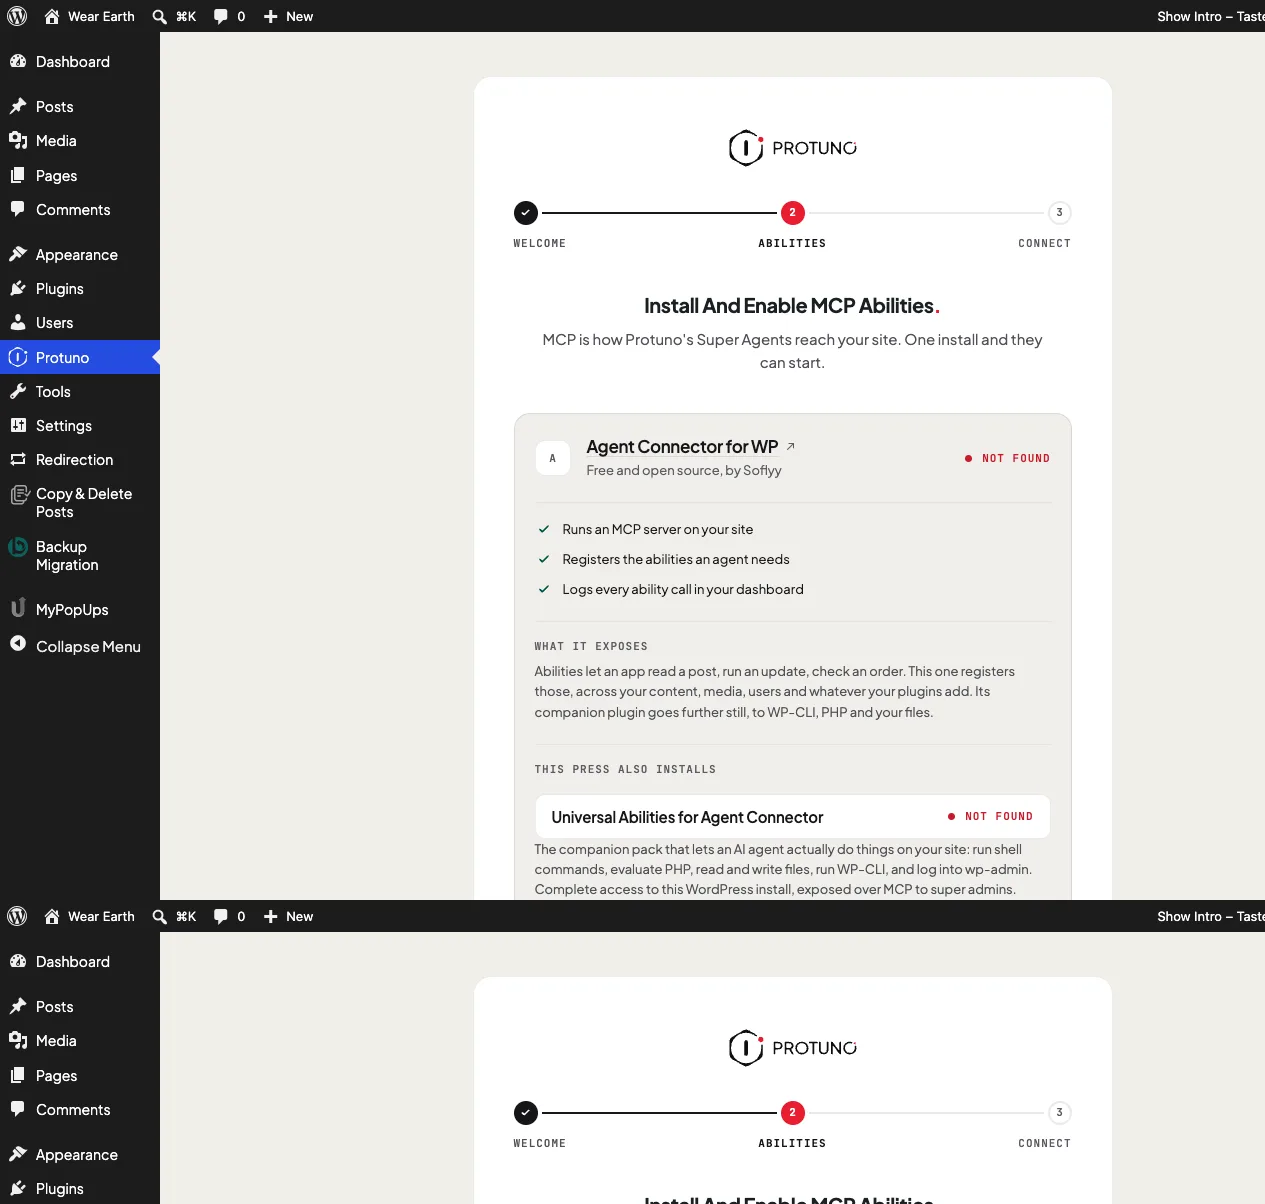
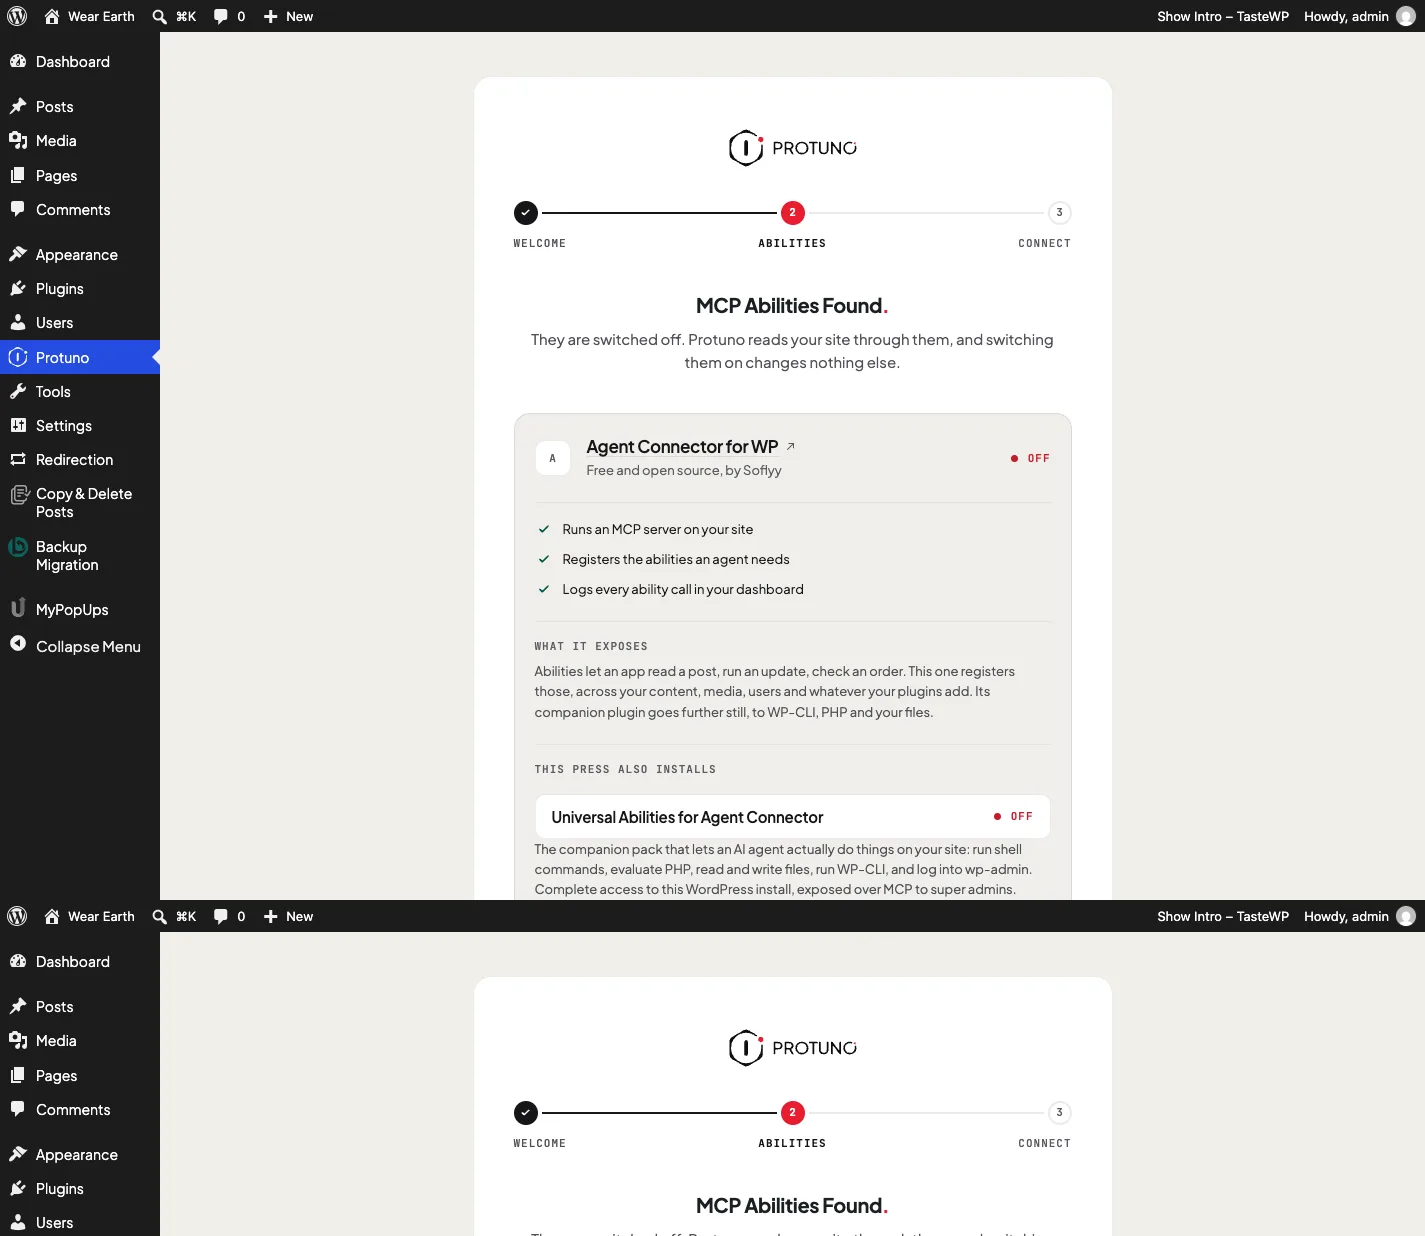
| The heading says | What it means | What to do |
|---|---|---|
| Install And Enable MCP Abilities | No MCP connector on the site. | Press Install & Enable MCP. It installs Agent Connector for WP and Universal Abilities, and switches both on. |
| MCP Abilities Found | A connector is installed but switched off. | Press Enable The Abilities. Switching them on changes nothing else. |
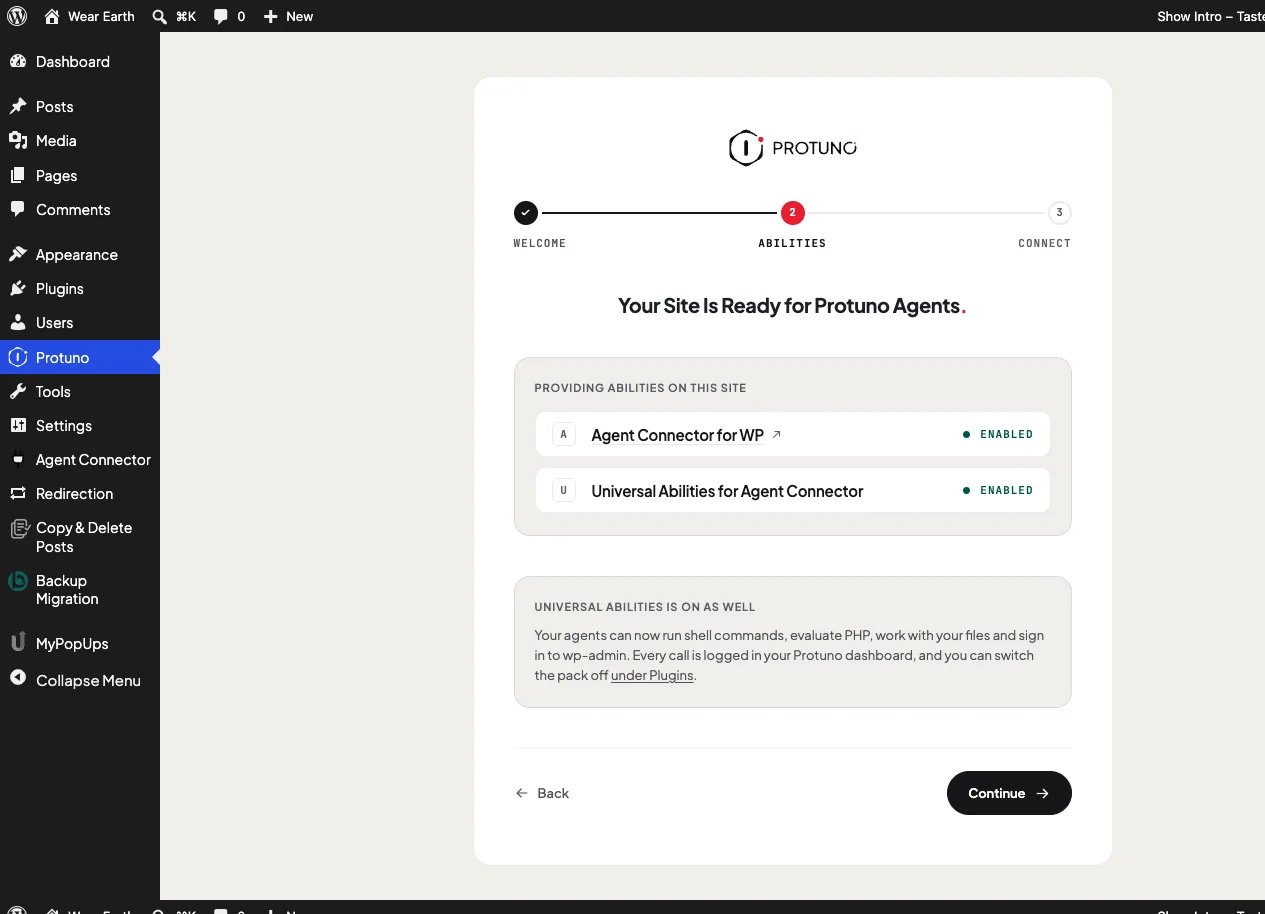
| Your Site Is Ready for Protuno Agents | A connector is running. | Check it is marked Enabled, then press Continue. |
| An MCP Server Is Already Running | A server Protuno has not been tested against. | Read what to do with an unrecognised server. |
Read what you are switching on. The same press that installs Agent Connector adds Universal Abilities, which gives an agent complete access to the install. The card on this screen says so before you press. Here is what it grants.
If your site runs more than one MCP server, this screen asks which one Protuno should use, and Continue stays hidden until one is enabled. Choosing between servers explains why there can only be one.
If your site does not allow plugins to be installed from the dashboard, the button reads Get The Connector instead. Install it by hand, come back, and the screen picks up where it left off. Switching on a connector that is already installed still works.
When the connector is running, press Continue. This is the moment the password is created.
Step three: Copy your credentials
The third screen, Your Site Credentials, shows two values: Username and Application password. Each has its own Copy button.
You see the password once. The plugin does not save it, so it will not be shown here again. If you leave before copying it, make a new one with Regenerate Password on the connection screen.
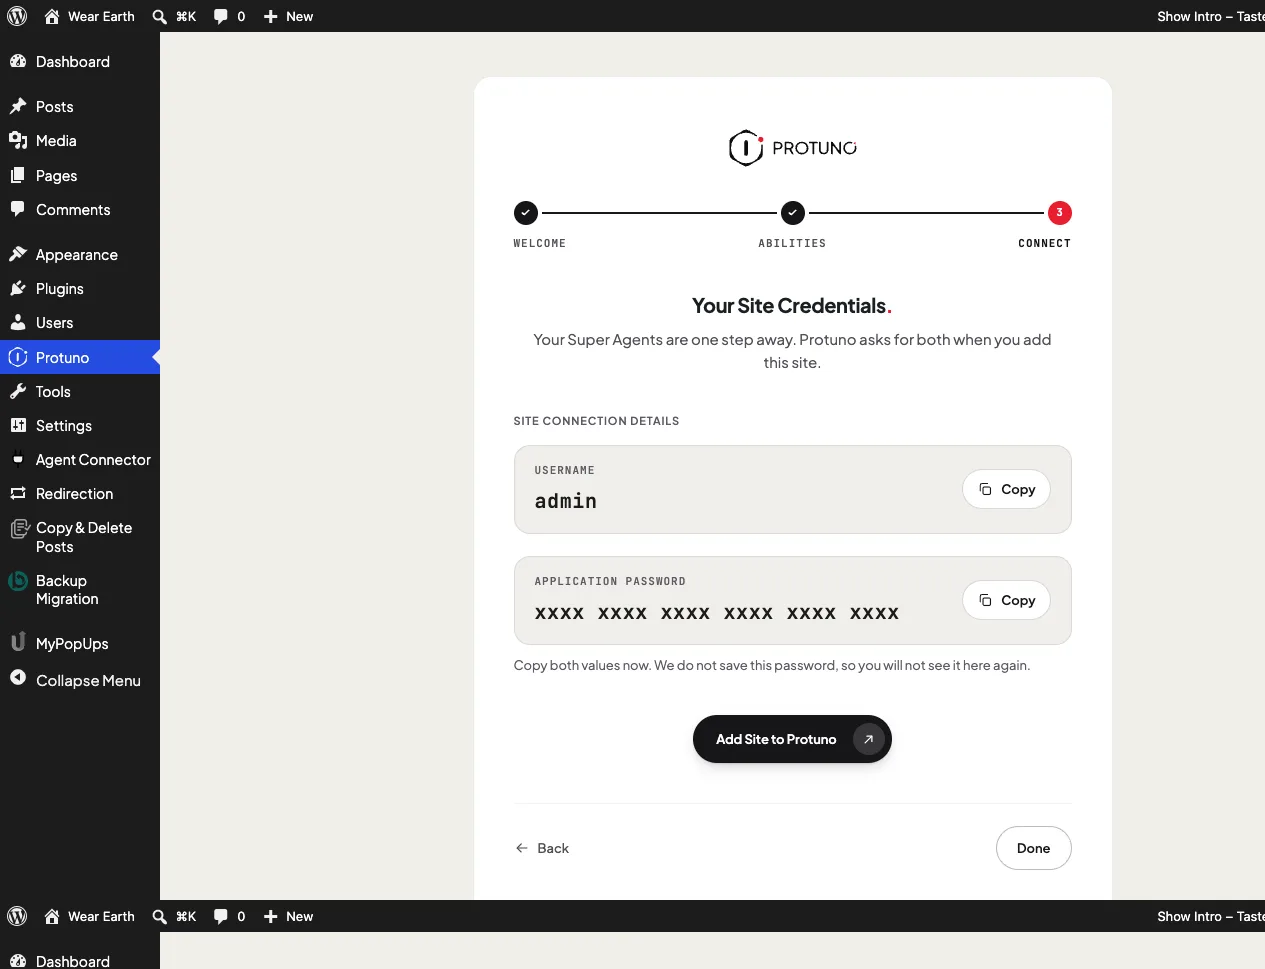
Press Add Site to Protuno. It opens your Protuno dashboard with this site already filled in. Paste both values there and save.
Back in wp-admin, press Done.
How you know it worked
The Protuno screen becomes the connection screen, headed Protuno Is Connected. It reads Waiting until Protuno reads the site for the first time, then Live.
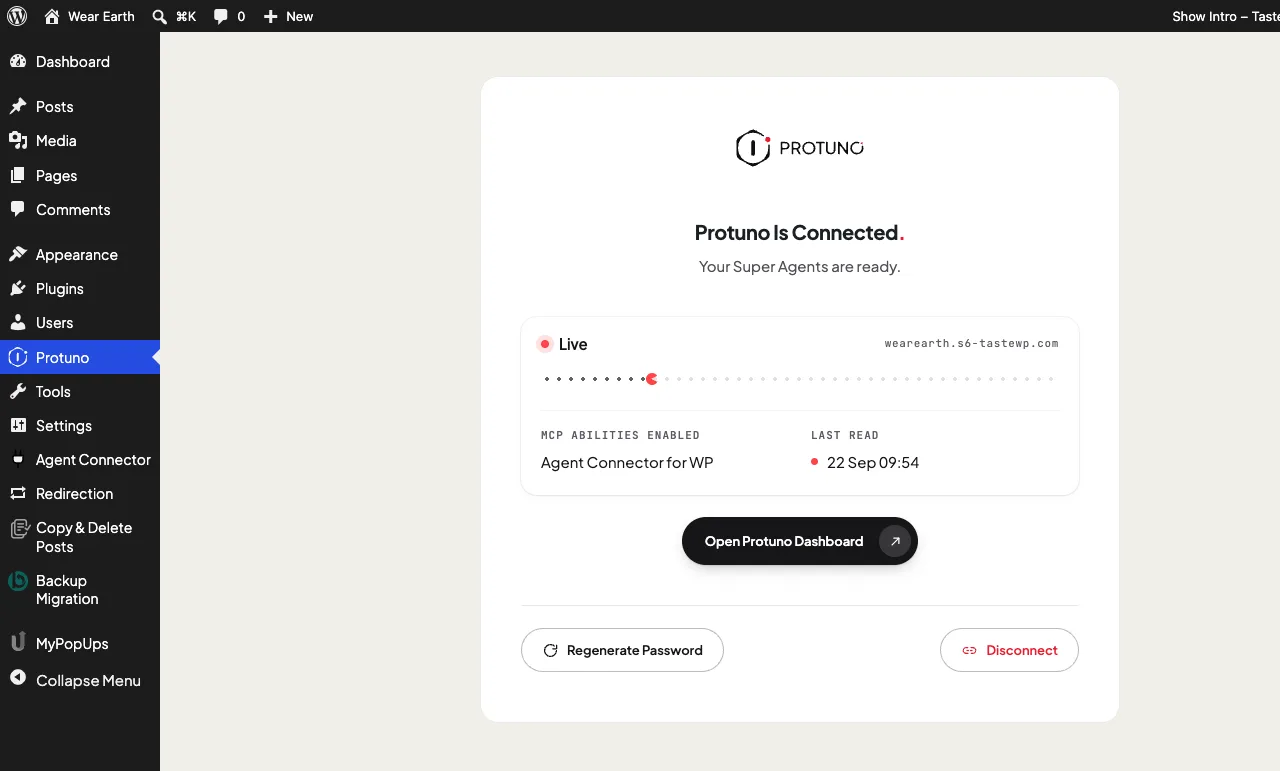
You do not need to reload. While the tab is open, the screen checks by itself every few seconds and updates when Protuno arrives.
If it stays on Waiting after you have pasted both values, see Stuck on Waiting.
Where to go next
- MCP Connectors and Abilities: what each connector can do, and how to switch Universal Abilities off.
- Manage and Secure the Connection: what the connection screen tells you, and how to end it.
Comments